
Mama’s Peanut Butter Crisscross Cookies — Crispy Edges, Chewy Centers 🥜
You Don’t Need a Reason to Make These
Peanut butter crisscross cookies are the kind of cookie that doesn’t ask for an occasion. It’s a sunny Thursday afternoon, I’m thinking about my mama, and I’m in the kitchen pulling out shortening, peanut butter, and the big red bowl. These are mama’s peanut butter crisscross cookies — crispy around the edges, chewy in the middle, and so peanut buttery you’ll forget every store-bought cookie you’ve ever pretended to like.
This post contains affiliate links. As an Amazon Associate I earn from qualifying purchases. If you purchase through my links, I may earn a small commission at no extra cost to you. Thank you for supporting StephanieCooksForACrowd.com!
Watch me make these peanut butter crisscross cookies from start to finish — or scroll down for the full printable recipe card.
Featured Tools & Ingredients
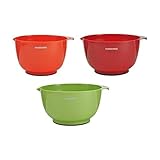
- SET INCLUDES: 4.5 quart, 3.5 quart, and 2.5 quart sizes
- NONSLIP BASE: keeps bowls stable while in use
• My big red bowl. I have all three sizes and use them every single time I bake.

- HEAVY DUTY APRONS FOR WOMEN: NEOVIVA women’s apron, style Diana, mainly made of durable cotton...
- DRESS APRON FOR WOMEN: NEOVIVA canvas apron, style Diana, features in large skirt hem to allow girl...
• My favorite apron — the big front pocket holds my phone while I follow along with the recipe.

- SET OF 2 BAKING SHEETS: GoodCook’s Nonstick Cookie Sheet Set comes with two extra-large 15” x...
- EVEN BAKE, EVERY TIME: The heavy-duty gauge baking pans in this bakeware set ensure long-lasting...
• Where every batch bakes. I keep two going so one's in the oven while the next gets its crisscross. Heavy enough that the bottoms brown even, not burnt.
See the complete shopping list ↓

Peanut Butter Crisscross Cookies
Loved This One? Save It to Your Plan
Tap to drop this recipe into your own meal plan — then one click turns your whole week into a grocery list you can print or shop. Free for my Newsletter subscribers.
Ingredients
- 1 cup shortening Crisco is recommended
- 1 cup granulated sugar
- 1 cup brown sugar
- 2 large eggs
- 1 cup creamy peanut butter
- 1 teaspoon vanilla
- 2 cups all-purpose flour
- 4 teaspoons baking powder
Method
- Preheat oven to 350°F. Line two cookie sheets with parchment paper or leave ungreased.
- Combine the shortening, granulated sugar, brown sugar, eggs, peanut butter, and vanilla in a large mixing bowl.
- Add the flour and baking powder and mix everything together until the dough is thick, smooth, and uniform. It will be a stiff, solid dough.
- Use a cookie scoop or large spoon to portion the dough onto the cookie sheets, leaving about 2 inches between cookies.
- Press the back of a fork into each cookie twice — once each direction — to make the classic crisscross pattern, flattening the cookie as you go.
- Bake at 350°F for 10 to 12 minutes, until the edges are golden brown and just starting to crisp. The centers will look slightly underdone — that’s the goal.
- Let the cookies cool on the pan for 1 minute before transferring to a wire rack to finish cooling.
Nutrition
Video
Notes
Tried this recipe?
Tap the stars above to rate it! This helps other families find it.Why These Peanut Butter Crisscross Cookies Work
Peanut butter crisscross cookies don’t need a single fancy step. You dump everything into one bowl, mix until it’s a thick, solid dough, scoop it onto a cookie sheet , and press a fork crisscross on top. That’s the whole technique. The reason mama’s recipe turns out so good is the balance — equal parts shortening, granulated sugar, and brown sugar means structure plus chewiness plus that deep caramel note. Then a full cup of creamy peanut butter does the heavy lifting on flavor.
The four teaspoons of baking powder (yes, four — that’s not a typo) is what gives the cookies their slightly puffy, tender bite in the middle while the edges still go crispy. There’s no baking soda in this recipe at all. The full tablespoon-plus-a-teaspoon of baking powder is doing the lifting work all on its own.
One thing I love about this recipe — and the reason I make it on a random Thursday for no reason at all — is that it’s all pantry staples. Shortening, sugar, brown sugar, eggs, peanut butter, vanilla, flour, baking powder. Nothing exotic, nothing you have to special-order. Just the things mama always had on hand, the way she made them when I was little.

A Few Things That Make Peanut Butter Crisscross Cookies Even Easier
- Use a cookie scoop. A medium spring-loaded scoop gives you uniform cookies that bake evenly. If you don’t have one, a heaping tablespoon works fine — just try to keep them about the same size so they finish at the same time.
- Don’t skip the fork crisscross. The crisscross isn’t just decoration — it flattens the cookie so the center cooks through before the edges go too far. Press the fork down twice, once each direction, and don’t worry if the dough sticks. Just dip the fork in a little flour or sugar between cookies.
- Pull them at 10 to 12 minutes. The edges should be golden brown and just starting to crisp. The center will look slightly underdone — that’s the goal. They keep baking on the sheet for another minute or two after you pull them, and the chewy center is the whole point.
- Let them cool on the pan a minute before moving them. Right out of the oven they’re soft and want to fall apart. Give them 60 seconds on the hot pan to set up, then transfer to a rack.
- Use creamy, conventional peanut butter. The classic supermarket kind — the stuff with a little sugar and salt in it — is what makes these taste like the cookies you remember. Natural peanut butter where the oil separates can throw off the texture.
Peanut Butter Crisscross Cookies FAQ — The Questions I Get Every Time
What temperature and how long do I bake peanut butter crisscross cookies?
Bake at 350°F for 10 to 12 minutes. Pull them when the edges are golden brown and just starting to crisp — the centers will look slightly underdone, which is exactly what you want. They finish setting up on the hot pan during the first minute out of the oven and the centers stay soft and chewy.
Can I make peanut butter crisscross cookie dough ahead of time?
Yes — the dough holds beautifully in the fridge for two or three days. Cover the bowl tight with plastic wrap. When you’re ready to bake, let it sit on the counter for about 10 minutes so it’s scoopable, then proceed as normal. You may need to add an extra minute to the bake time. King Arthur Baking has a great breakdown on how to handle peanut butter cookie dough if you want to read more on the technique.
Can I freeze peanut butter crisscross cookies?
Absolutely. Baked cookies freeze in a zip-top bag for up to two months — let them thaw on the counter for about 20 minutes before serving. You can also freeze the dough scooped and crisscrossed on a sheet pan, then transfer the frozen dough balls to a bag. Bake straight from frozen, adding two or three minutes to the bake time.
Can I use butter instead of shortening?
You can, but they’ll spread more and lose some of that signature soft-chewy center. Mama always used Crisco shortening and so do I. If you want to swap in butter, use the same amount and chill the dough for 30 minutes before scooping to help control the spread.
Why four teaspoons of baking powder? That seems like a lot.
I know — it always looks like a lot. But this recipe doesn’t have any baking soda, and the four teaspoons of baking powder is what gives the cookies their lift and tender middle. Don’t reduce it. That’s one tablespoon plus one teaspoon if you want to measure it that way.
How many peanut butter crisscross cookies does this recipe make?
About 36 cookies with a medium cookie scoop, or around 24 if you’re going bigger. Plenty for a crowd, plenty to share, plenty to keep some at home for yourself. They store in an airtight container at room temperature for up to a week.
Can I add chocolate chips?
Sure can. Half a cup to a cup of chocolate chips folded in at the end turns these into peanut butter chocolate chip cookies. Skip the fork crisscross if you do — the chips get in the way of the pattern.
🛒 Complete Shopping List
Everything you need to make these Peanut Butter Crisscross Cookies — click any item to shop on Amazon.
Ingredients


Equipment
More Cookie Recipes You’ll Love
- Toll House Chocolate Chip Cookie Bars — same family-recipe energy, baked in a 9×13 for a crowd.
- No Bake Chocolate Oatmeal Cookies — when the oven is the last thing you want to turn on, these are done in 10 minutes on the stovetop.
- Soft Chewy Molasses Cookies — warm, spiced, and chewy with crackly sugar tops, no chilling required.
- Texas Sheet Cake — the chocolate dessert I make every single time I need to feed a true crowd.
Want a little note from my table every Saturday? Join my weekly newsletter — recipes, family moments, and whatever’s happening at the Longstreth house. Sign up here.
Peanut Butter Crisscross Cookies — About Stephanie’s Recipes
Stephanie Longstreth is the home cook, mom, and storyteller behind StephanieCooksForACrowd.com. She cooks for a family of seven in Florida — five kids, two cats, and one husband who appreciates a good meal. Four of her children came home through adoption, and family stories are woven into everything she makes and shares. Find her crowd-friendly recipes, weekly meal plans, and real family life on TikTok, Instagram, YouTube, and Pinterest @stephaniecooksforacrowd.
I made these a few days ago and I love peanut butter cookies. I wanted this one to turn out well I use sugar-free peanut butter and my cookies did not hold together. I am assuming it’s because of the sugar-free peanut butter
Hi Sherry! I’m so glad you love peanut butter cookies as much as we do — and your hunch is right, it comes down to the peanut butter. This is my mama’s recipe and it’s built around regular creamy peanut butter (the Jif or Skippy kind). Sugar-free jars are usually a natural-style butter where the oil separates, so the dough turns loose and won’t bind — and since these are already a tender, delicate cookie, that’s just enough to tip them from soft into falling apart. You didn’t do a thing wrong!
If you’d like to keep using your sugar-free kind, you absolutely can — the dough just needs a little extra help. Stir the jar really well first so the oil is fully mixed back in, then chill the dough in the fridge for 30 to 60 minutes before you scoop, which firms everything up so the cookies hold their shape. If they’re still on the tender side, next time work in an extra tablespoon or two of flour, or one extra egg yolk, and let them cool all the way on the pan before moving them — they’re most fragile while they’re warm. They’ll hold together much better that way, even though a natural-PB batch will always stay a touch softer than the regular kind.
So glad they still tasted delicious to you — that’s the part that matters most. Thank you for baking them and coming back to let me know! 💛